The Instant Swap feature on SwiftEx S-DEX allows you to quickly convert between supported digital assets using real-time price quotes. It is designed for users who want fast and simple asset conversion without complex interfaces.
Note: This feature requires Stellar Wallet activation before use.
Follow these steps to convert one cryptocurrency into another using Instant Swap:
Step 1: Navigate to Instant Swap
From the default Wallet screen, locate and tap the 'S-DEX' tab. Once inside the S-DEX screen, you'll see various asset management options. Select 'Swap Assets' to access the conversion features, then choose 'Instant Swap' for quick asset conversions with real-time pricing.
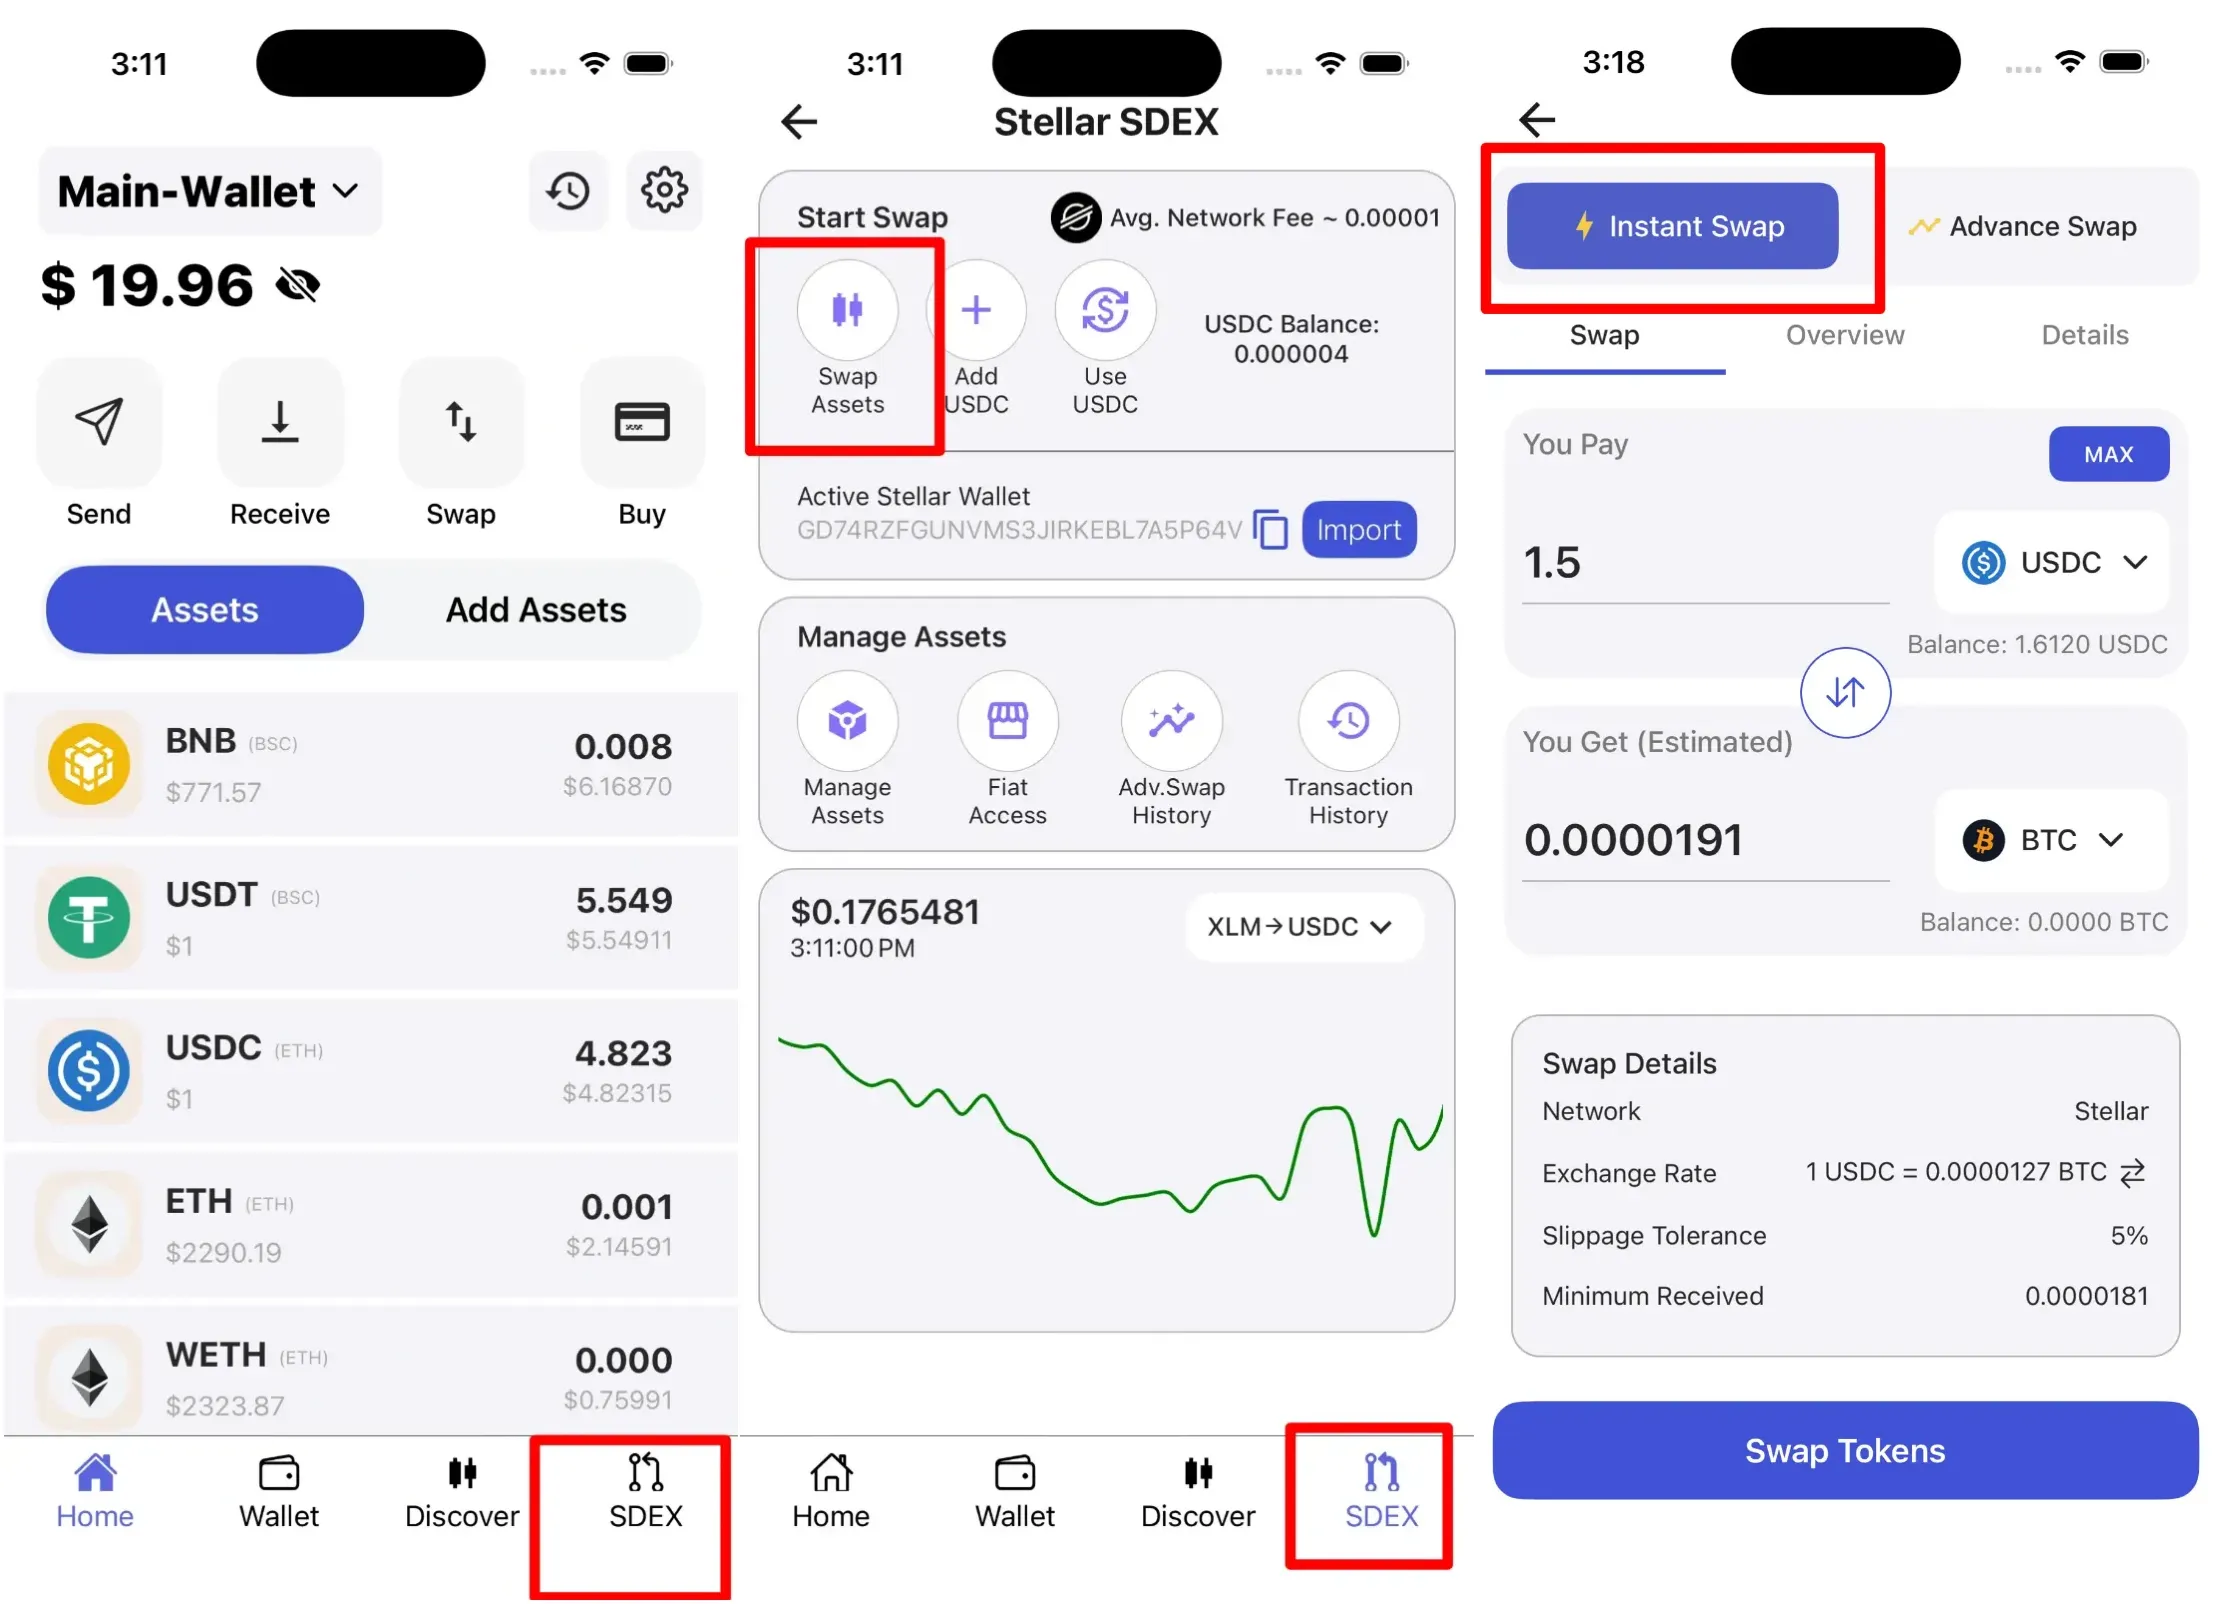
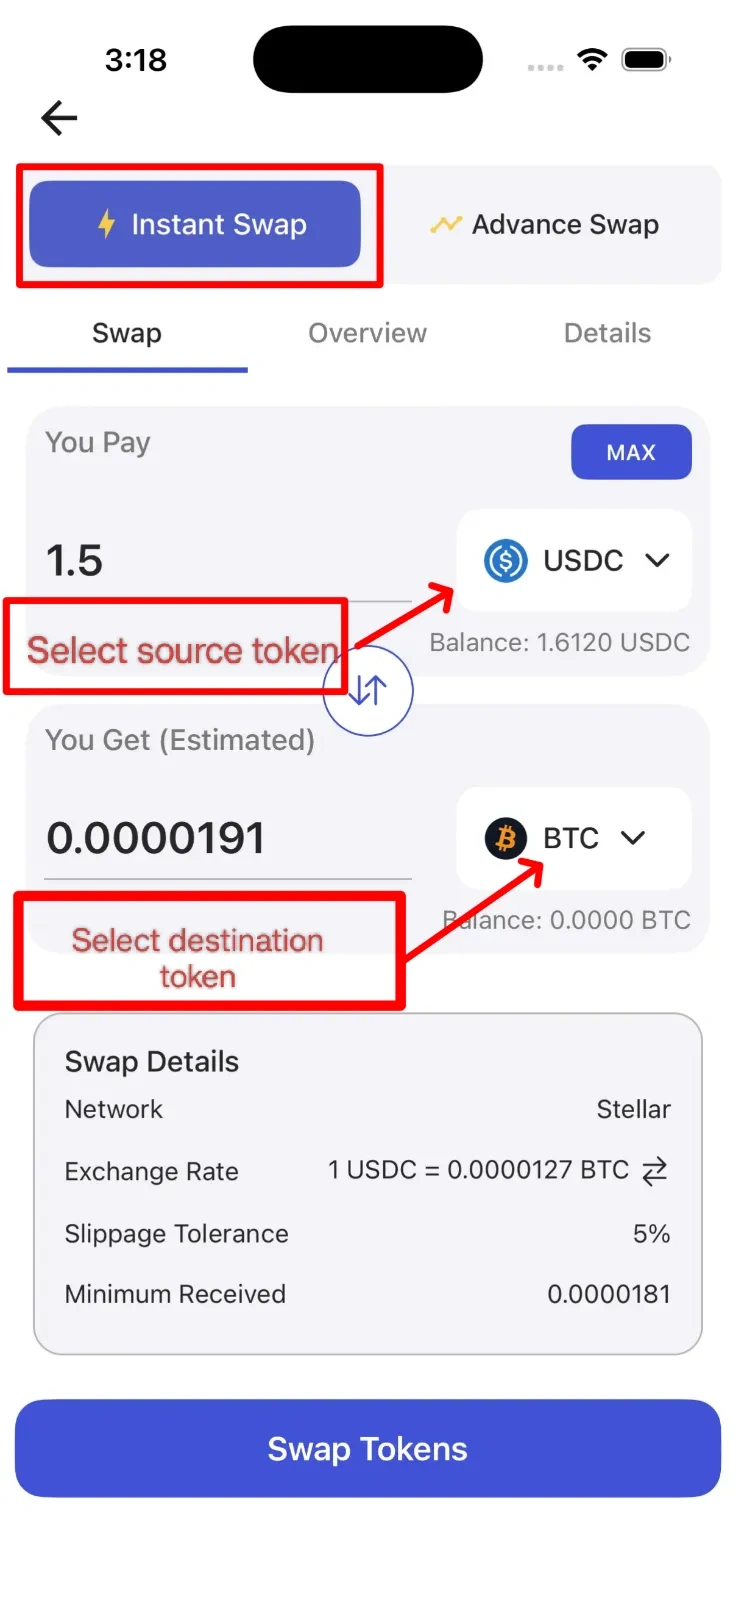
Step 2: Select Asset Pair
You'll now need to specify which assets you want to convert. First, choose the asset you want to convert from - this will be deducted from your wallet. Next, select the asset you want to receive after the conversion is complete. The available assets depend on your wallet balances, supported networks, and available liquidity routes within the S-DEX system. Make sure you have sufficient balance of the source asset before proceeding.
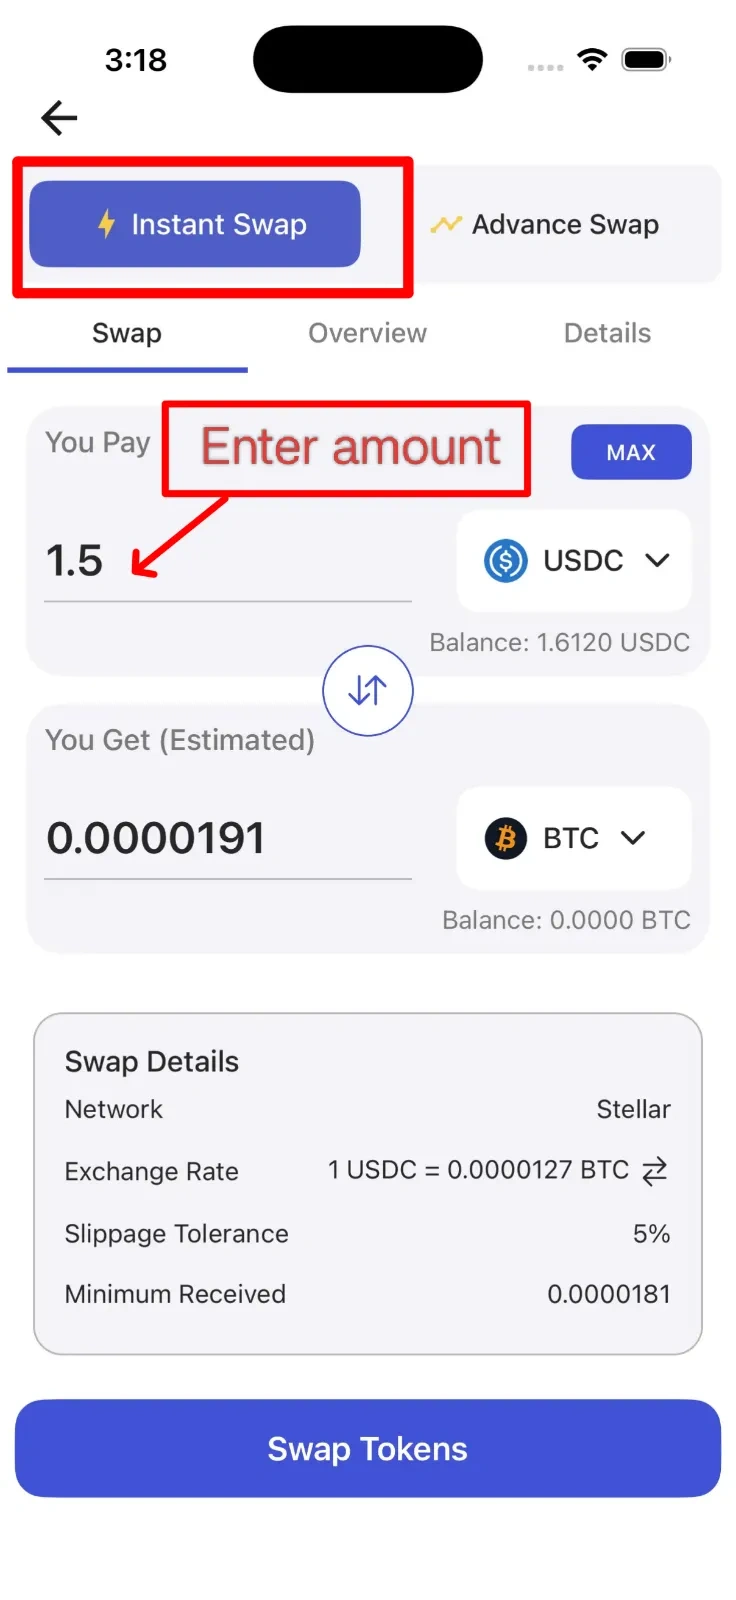
Step 3: Enter Amount
Enter the precise amount of the source asset you want to convert. You can type the amount manually As you enter the amount, the system will automatically calculate and display the estimated output amount you'll receive based on current conversion rates. This calculation happens in real-time, so the estimated output may adjust slightly as market conditions change.
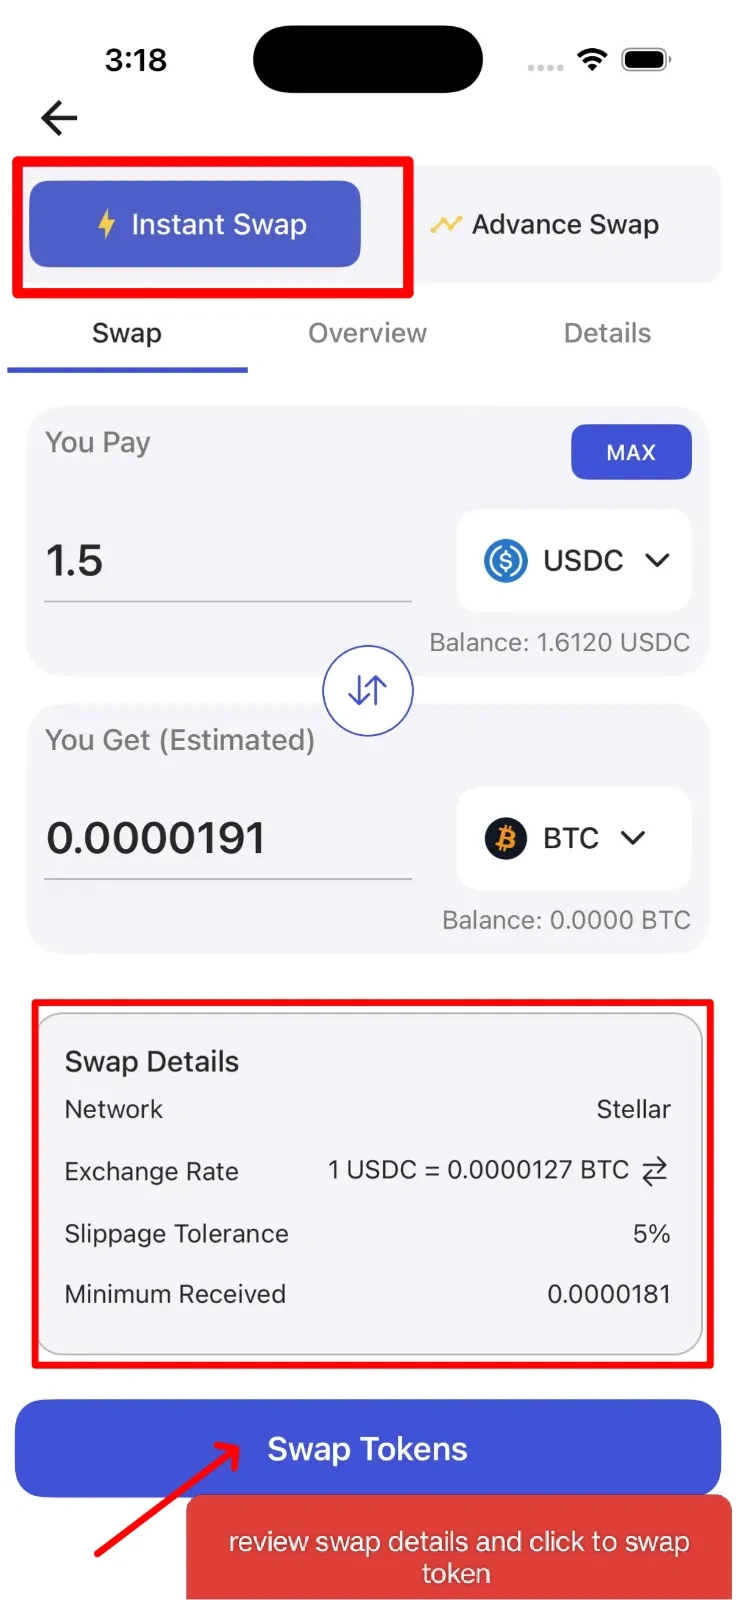
Step 4: Review Conversion Details
Before proceeding, carefully review all the important details of your conversion:
• Conversion Rate: The current rate at which your assets will be converted. This rate is fetched in real-time from integrated liquidity partners.
• Estimated Network Fee: The blockchain network fee required to process this conversion transaction. This fee goes to the network validators, not to SwiftEx.
• Minimum Received: The guaranteed minimum amount you'll receive, accounting for potential minor rate fluctuations during processing. This protects you from unexpected price changes.
Take your time to verify all these details are acceptable before moving forward. If any values seem incorrect or unexpected, you can go back and adjust your inputs.
Step 5: Confirm Swap
Once you've reviewed and confirmed all the details are correct, tap the 'Confirm Swap' button to execute the conversion. The system will process your request immediately using real-time quotes from integrated liquidity partners. The conversion typically completes within a few moments, depending on network conditions. You can track the status and result of your conversion in your Transaction History, where you'll see a detailed record including the amounts converted, rates applied, and timestamp.