Add USDC allows you to bring supported stable assets from your wallets on other networks into your active Stellar wallet within the SwiftEx app.
Assets selected from Ethereum or BNB Smart Chain are bridged internally and made available as USDC on your active Stellar wallet.
Default Stellar Asset
On the Stellar network, USDC is used by default. This ensures a consistent experience when moving assets between Stellar and other networks.
Supported Networks
Source networks:
Ethereum,
BNB Smart Chain
Destination network:
Stellar (USDC)
How to Add USDC
-
Open S-DEX
From your SwiftEx home screen, locate and tap on the S-DEX icon or menu option. This will take you to the Stellar-specific features section where you can manage your Stellar assets and perform cross-chain operations.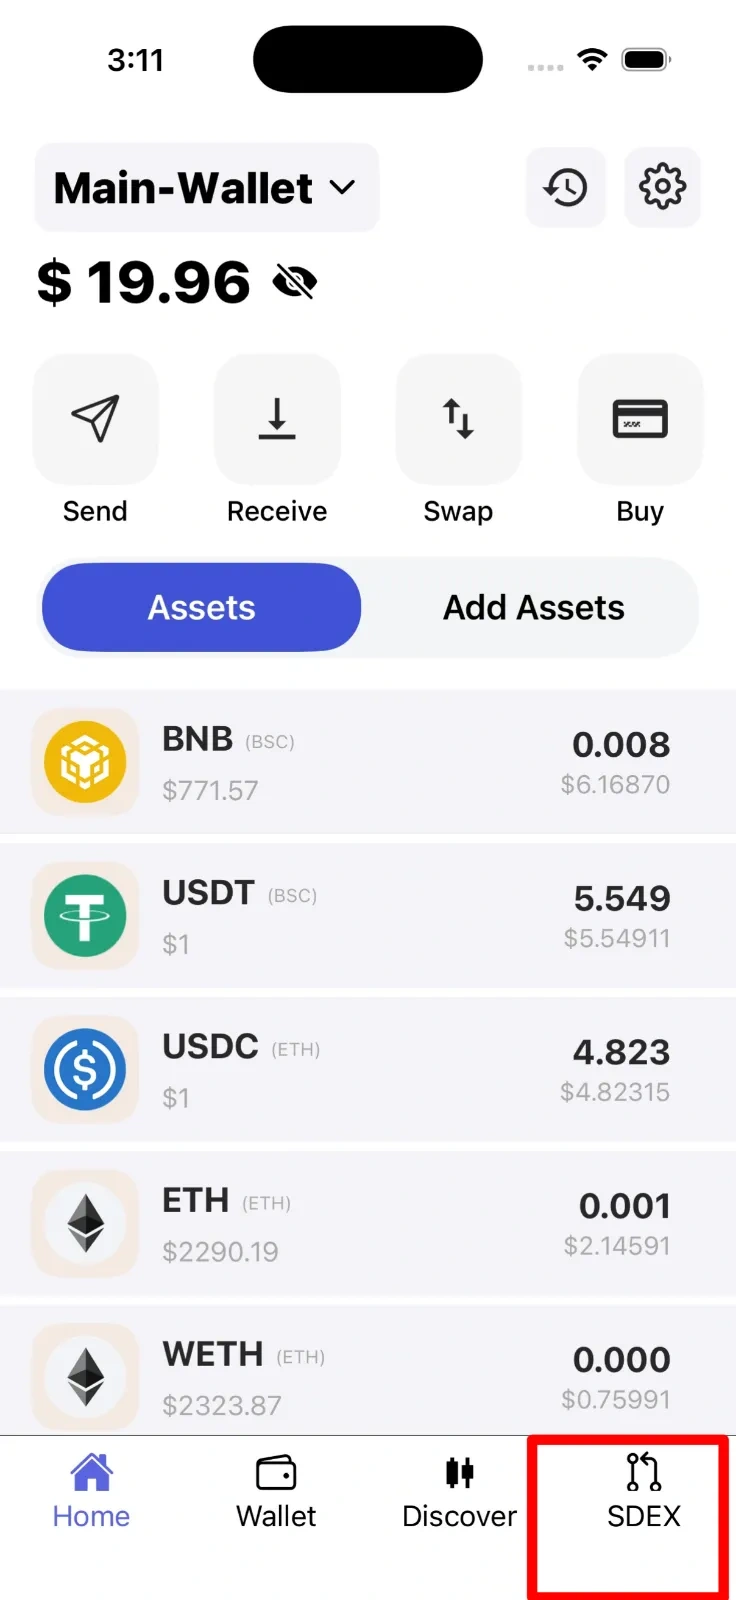
-
Select Add USDC
Once inside the S-DEX section, you'll see various options for managing your Stellar assets. Look for and tap on the Add USDC button or card. This initiates the process of bringing stablecoins from your wallets on other networks into your Stellar wallet.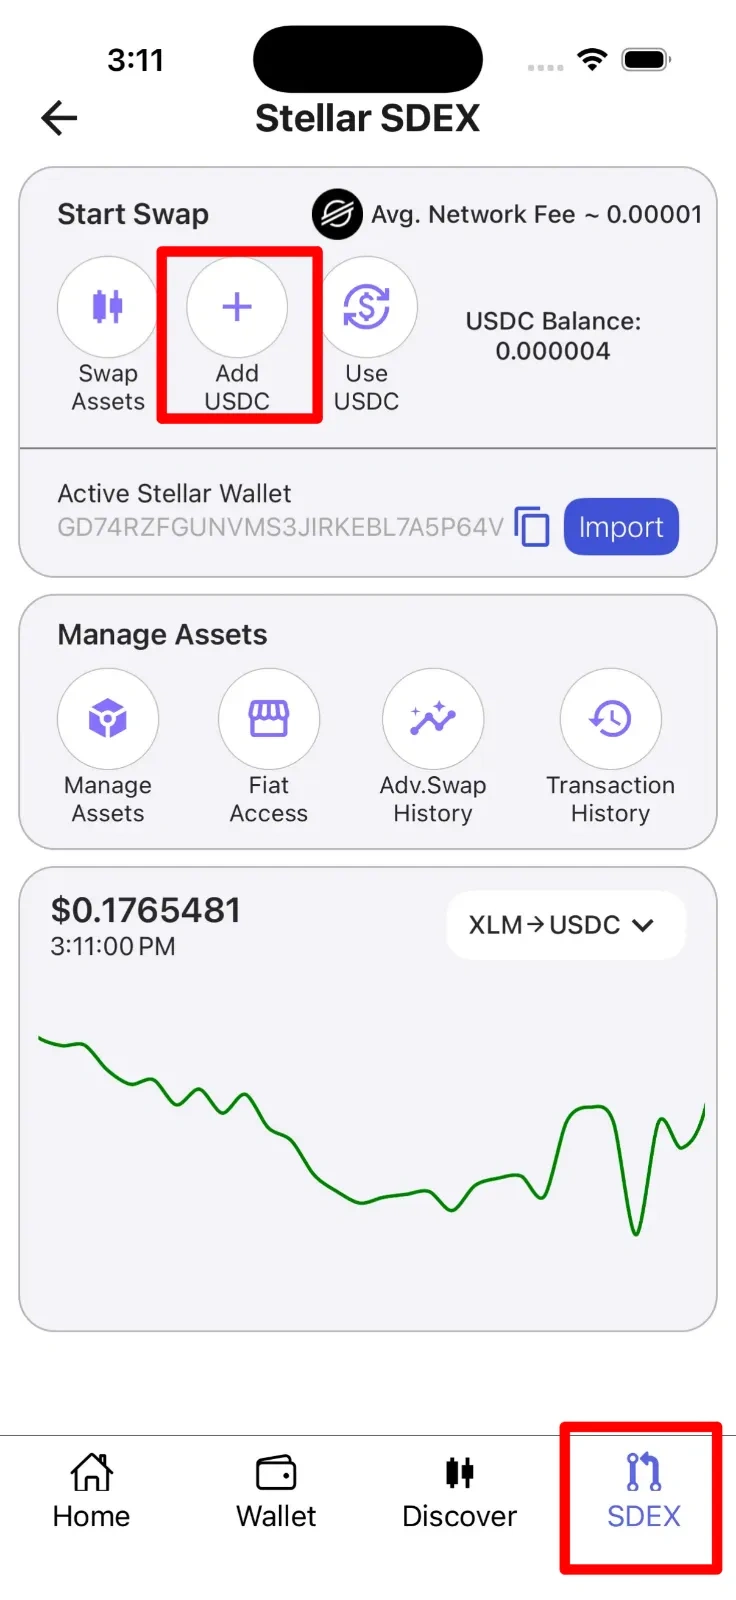
-
Select Source Network
You'll be presented with a list of supported source networks. Choose either Ethereum or BNB Smart Chain depending on where your stablecoins currently reside. The app will display your available balance on the selected network to help you decide.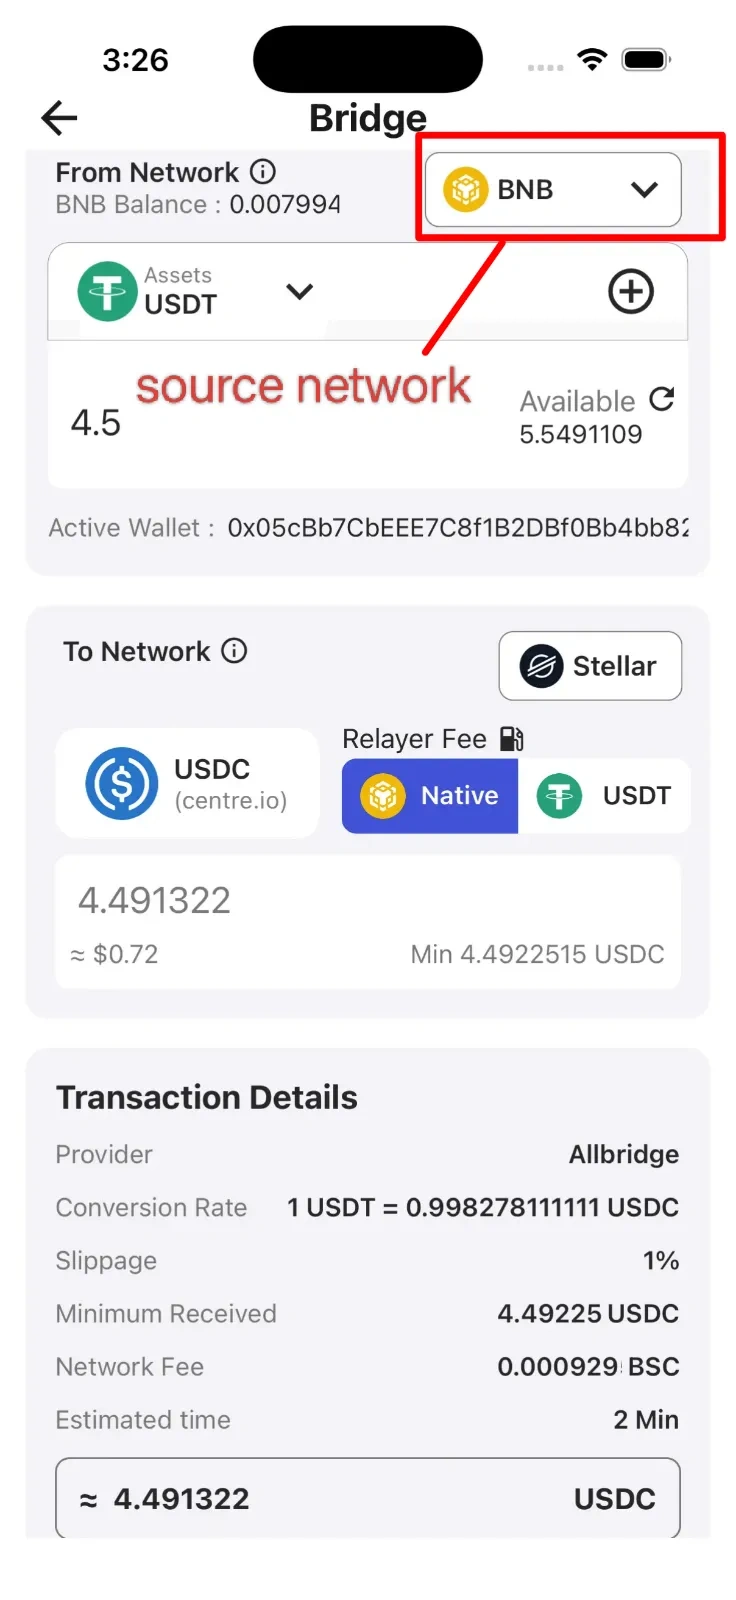
-
Select Asset
From the available stablecoins on your chosen network, select either USDC or USDT. Enter the amount you wish to transfer to your Stellar wallet. The app will show your current balance and may suggest a recommended amount based on available funds and minimum requirements.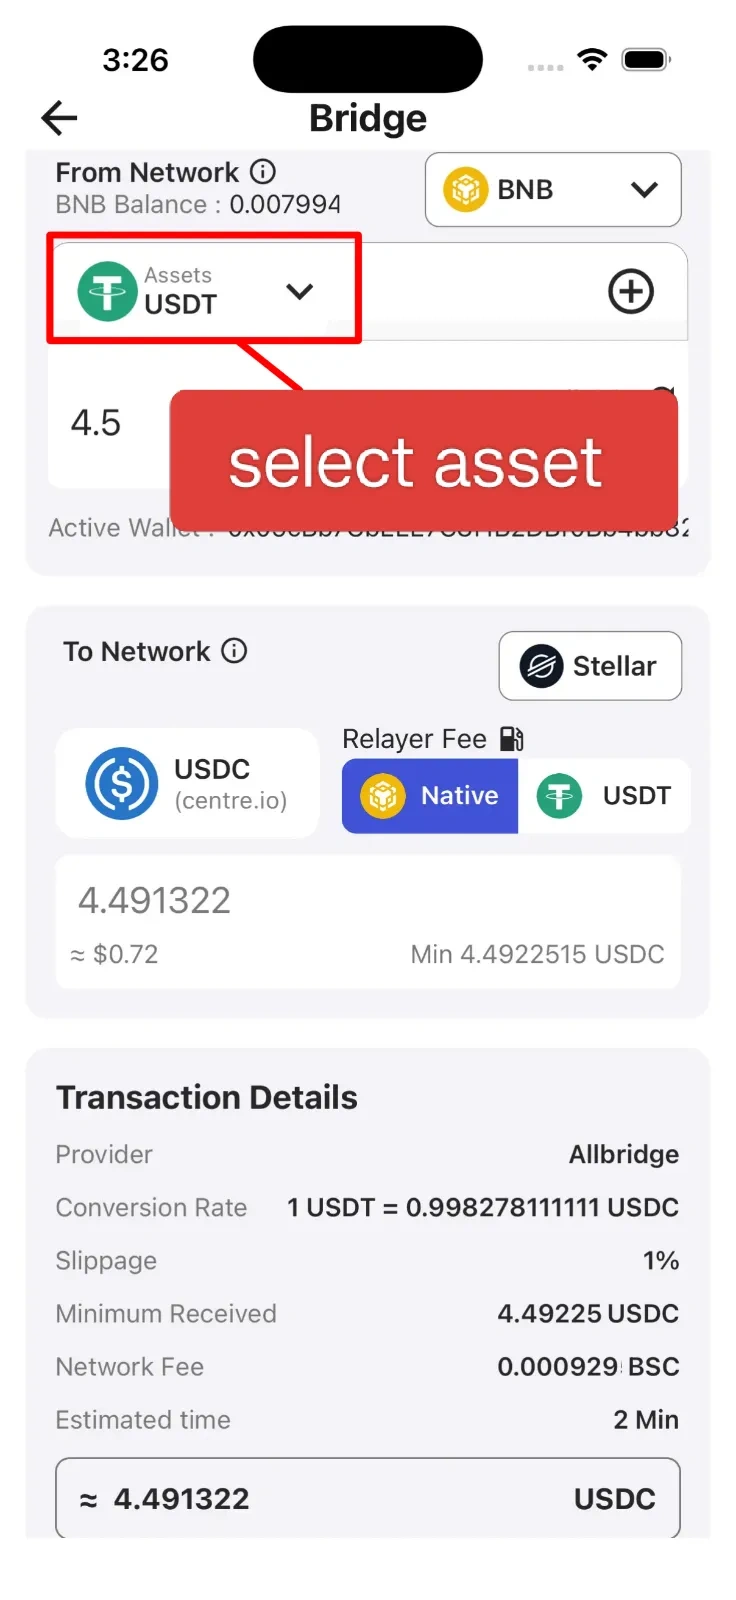
-
Select Fee Option
Choose how you'd like to pay for the transaction fee. You can either pay with the native token of the source network (ETH for Ethereum, BNB for BNB Smart Chain) or use asset-based fees where a small portion of the stablecoin you're transferring is used to cover the cost. Review the estimated fee amount before proceeding.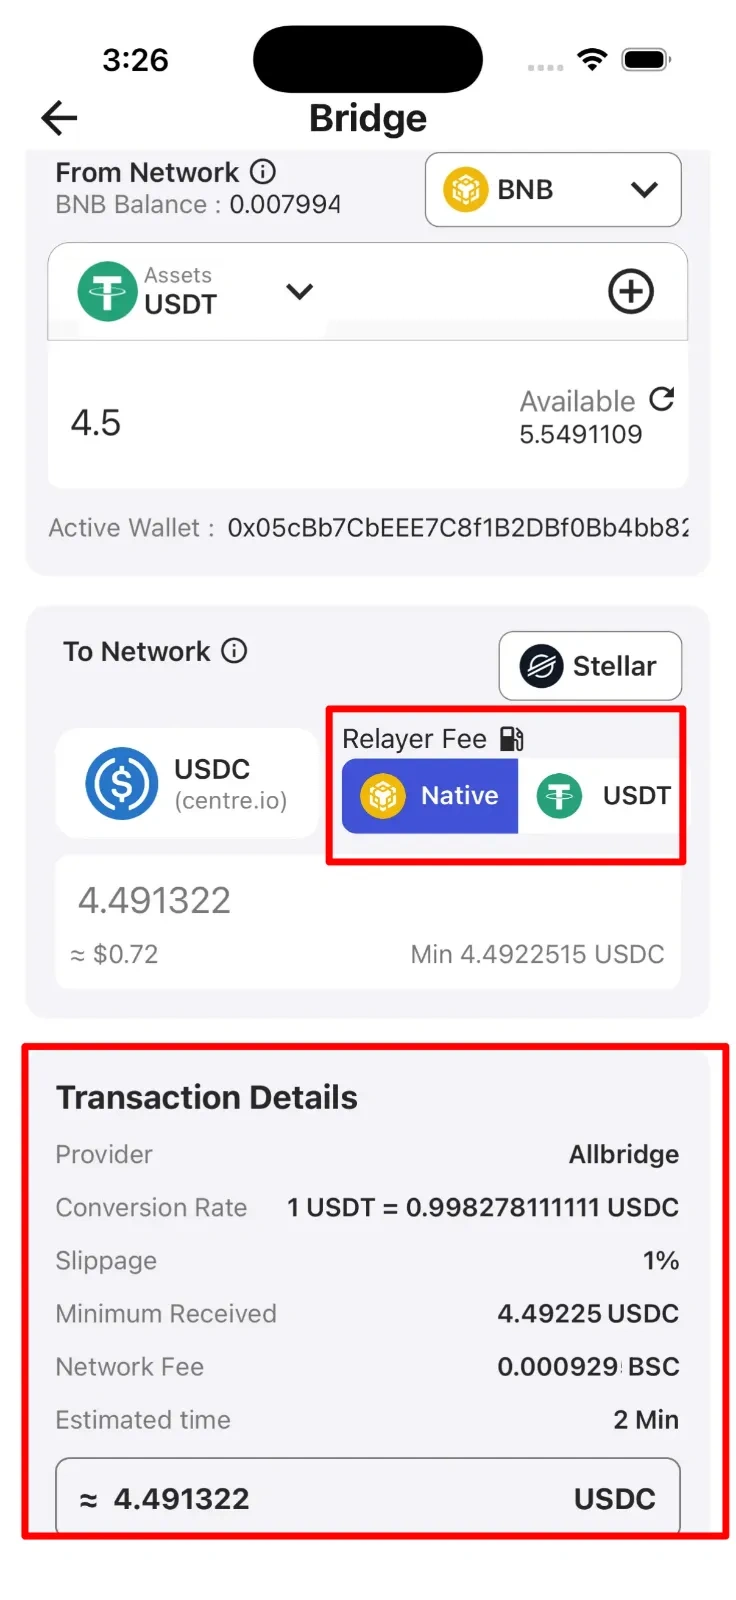
-
Confirm Destination
Review the transaction summary showing the amount being transferred and the destination. Your selected stablecoins will be automatically converted and made available as USDC on your active Stellar wallet. Verify that your Stellar wallet address is correct and that you understand the conversion that will take place.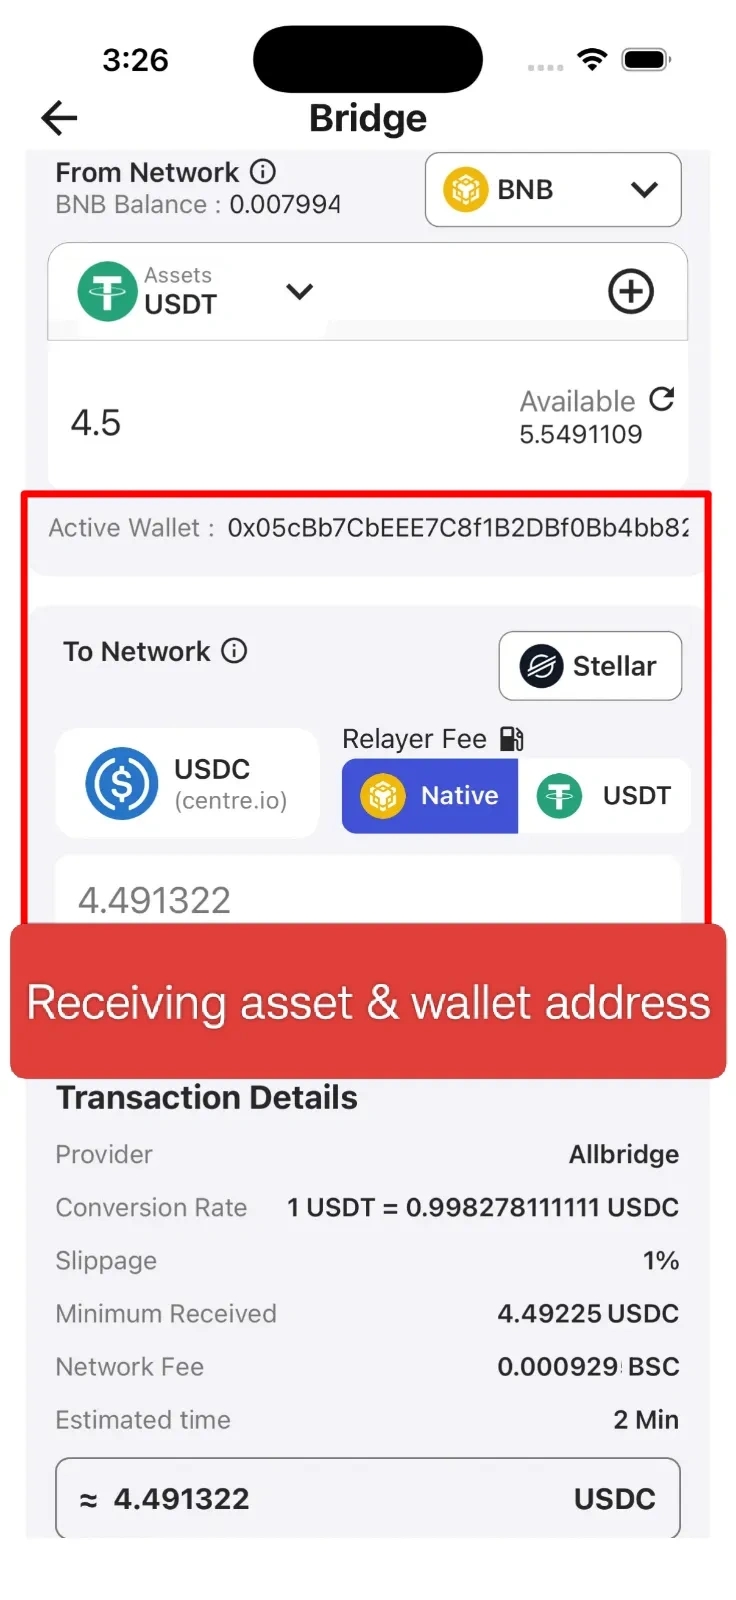
-
Confirm
After reviewing all transaction details including the amount, fees, and destination, tap the Confirm button to execute the transfer. The process may take a few moments to complete. Once finished, your USDC will appear in your Stellar wallet and you'll receive a confirmation notification.
Note
Asset movement happens only between your internal wallets within the SwiftEx app. SwiftEx does not provide exchange or trading services - this is purely an internal asset management feature to help you organize and access your funds across different blockchain networks.